Learn how to setup your new Deco X60 WiFi 6 Mesh WiFi sytem with Unifi
Before you begin
TP-Link Deco X60 is a Wi-Fi 6 whole home mesh Wi-Fi system that will give you better Wi-Fi coverage and faster speed for your entire home. It eliminates Wi-Fi dead zone with just one Wi-Fi name throughout the entire home.
You will need the following:
TP-Link Deco X60
An Android or iOS smartphone
Working Internet connection on the router provided by TM Unifi.
Setup of the main Deco X60
We will first setup the main unit that’s connected to the router from TM.
1
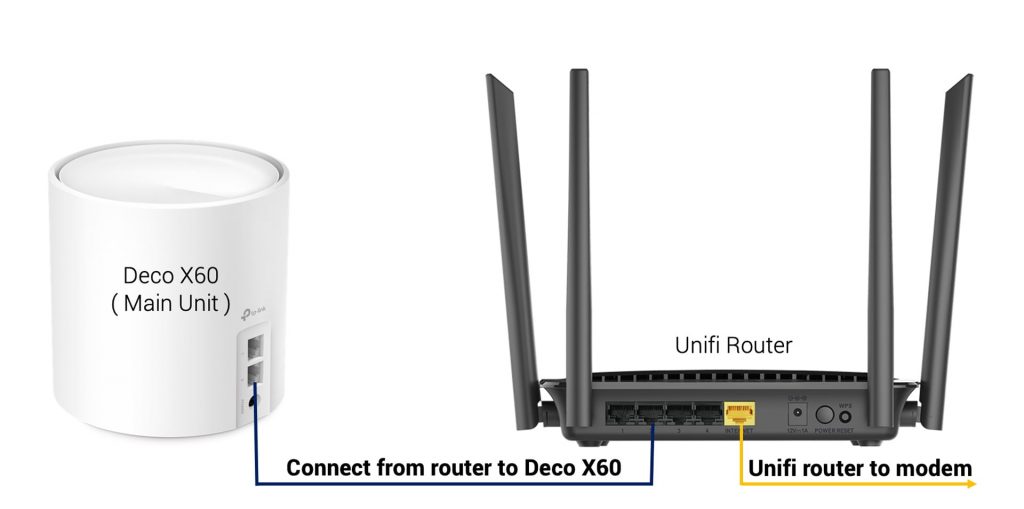
Connect the main unit to the modem
Connect the provided LAN cable from the LAN2/LAN3 port of the unifi Router to any ports on the Deco X60. Do not touch any existing cable from the modem or router.
2
Download the Deco app to setup the system
Download the “TP-Link Deco” app from the Google Play Store or Apple App Store. You’ll need the Deco app to setup or manage the Deco Mesh Wi-Fi system.
3
TP-Link Account Login
Create a new TP-Link account or login to your existing account. Remember to click the verify link in your email address.
4
Create your new Mesh WiFi
Click the “Let’s Begin” Button
5
Select the model
Choose Deco X60
6
Follow the guide on the app
Please IGNORE the wiring guide shown on the Deco app. Please follow the wiring procedure on Step 1.
7
Switch on the main unit
Switch the main unit that’s connected to the Unifi router on. Do not switch on the second unit yet. The main unit is ready to setup when the light is flashing in blue.
8
Connect to the factory default WiFi network
Connect to the factory default WiFi network to continue the setup. It’s labeled under the device.
9
Connect to the factory default WiFi network to continue setup
Connect to the factory default WiFi network to continue the setup.
10
Select where the main unit is located
Choose where you placed the main unit of Deco X60 on the Deco app.
11
Choose the Internet Connection mode
Make sure you done the wiring correctly in Step 1 and the Dynamic IP mode is selected.
12
Design your new WiFi name and password
Choose the new WiFi name and password you want for your mesh WiFi network.
Note: Use a different WiFi name and password unlike your old router.
13
Connect to the new WiFi network
You can now connect to your new mesh WiFi network once it is configured.
14
Setup Completed
Congratulations, the configuration of the first unit has been completed and you should have working Internet connection now.
Linking the second unit to the main unit
Now we will setup the second unit that will be wirelessly linked to the main unit to expand the WiFi the WiFi signal
1
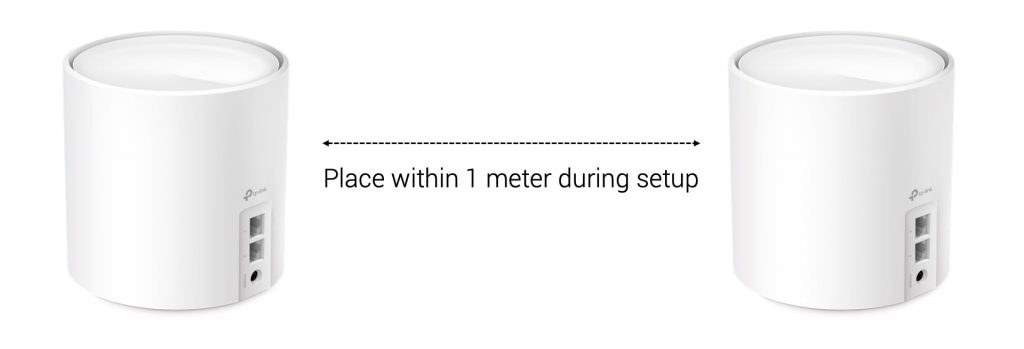
Put it near to the main unit
During the initial setup process, put it near to the main unit.
2
Switch on the power for the second unit
Connect the second unit to the power adapter and switch it on. Do not connect any LAN cable to the second unit.
3
Wait for 5 minutes until the light turn green
The second unit will automatically link with the main unit within 3-5 minutes. The linking is completed once the light turn green.
4
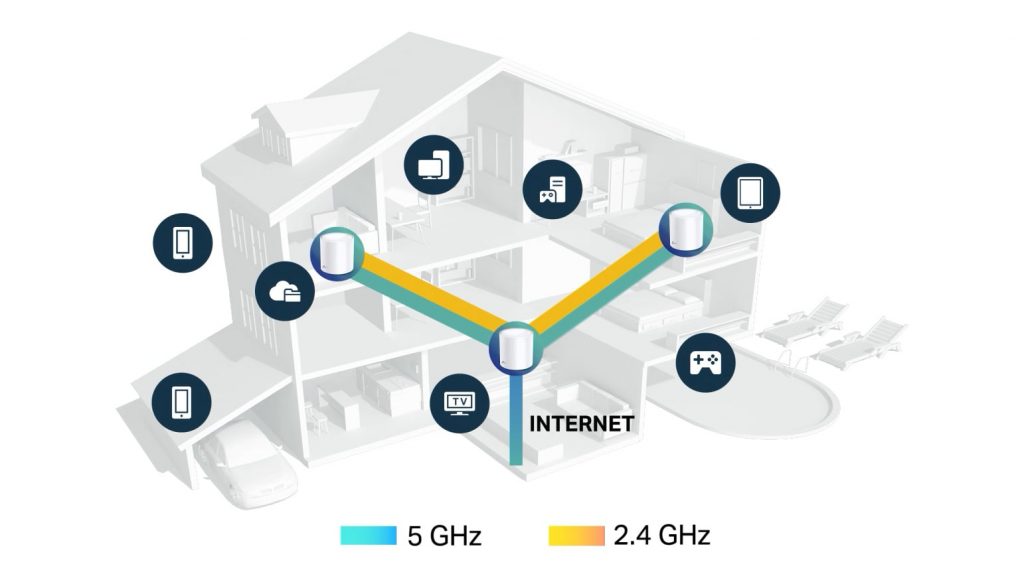
Move to desired position
Move the second unit to another position in your home to expand the coverage. We recommend not more than 2 walls from the main unit for an optimal performance.
Still facing issues?
Give us a call at 1300-22-8887. We’ll get back to you as soon as possible.